Why Use Offer Pools?
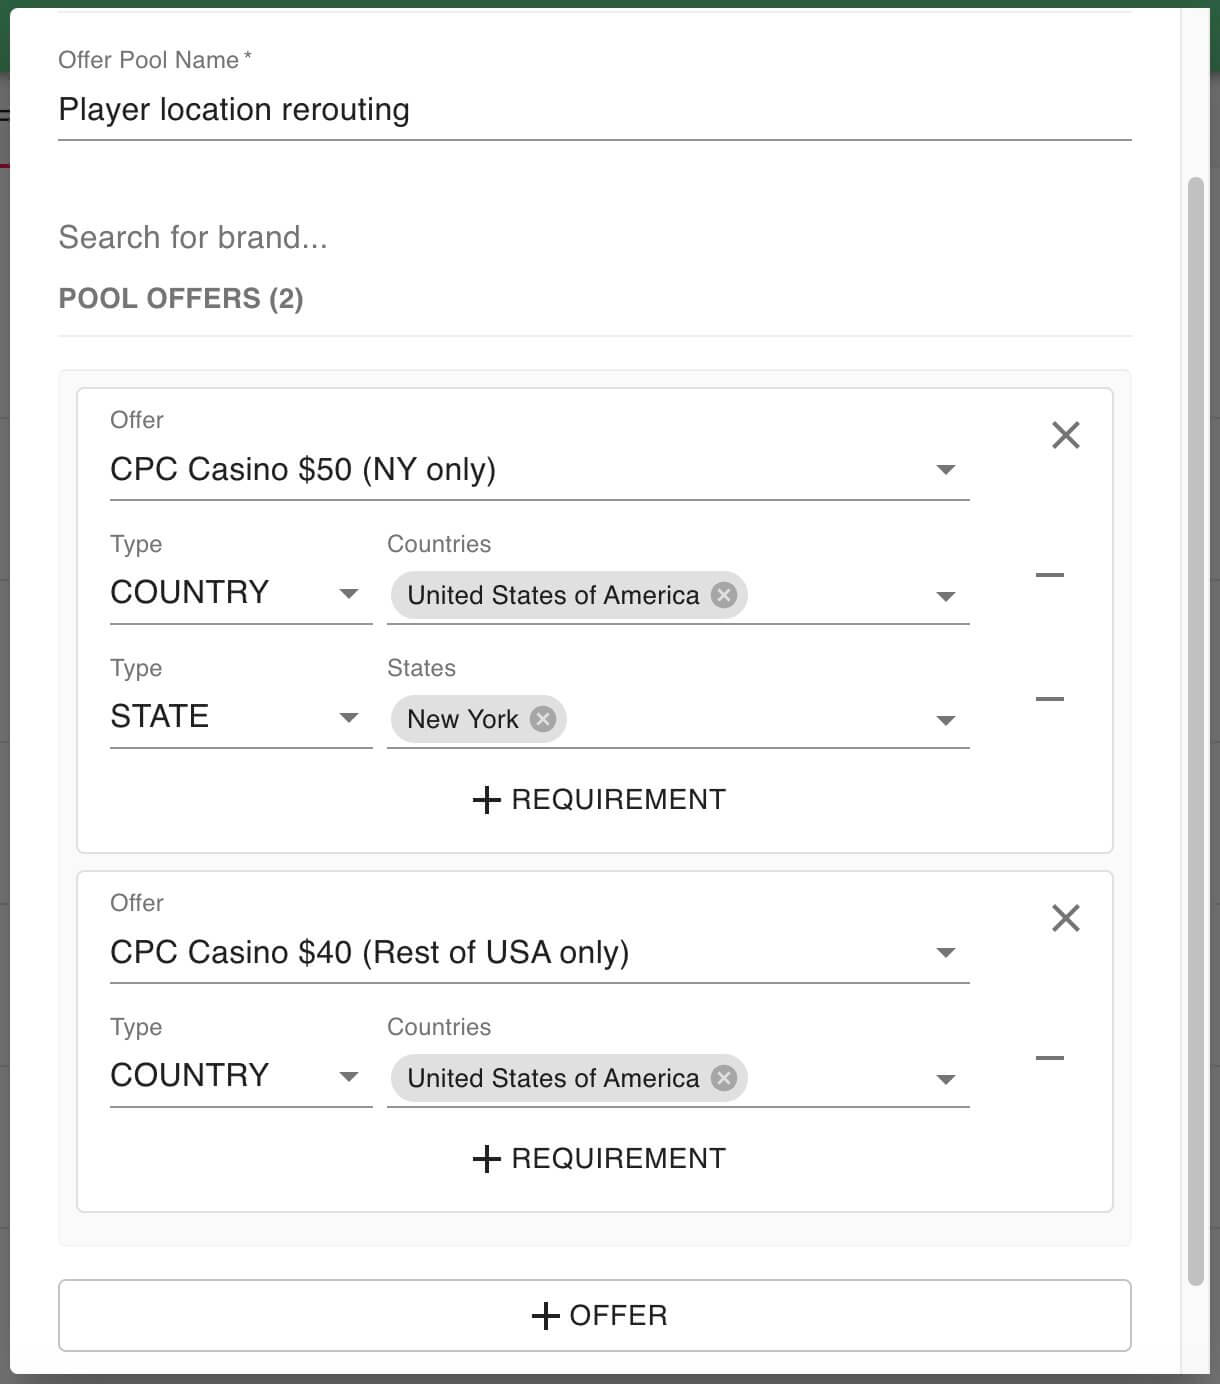
- You have different commission payouts for different locations (e.g., New York vs. the rest of the USA), but you’re unable to limit traffic by location initially. You can use an Offer Pool to reroute traffic based on the player’s actual location after verification.
- You have product- or vertical-specific offers, but players land on the site through a poker offer and later convert on a sportsbook offer. You want to ensure the payout is based on the sportsbook conversion, not the initial poker offer.
Before you get started, here are some technical functionality to be aware of
- Once you create an Offer Pool, it will be live, and traffic will start being rerouted immediately.
- You can deactivate or delete an Offer Pool at any time.
- Clicks/players are rerouted through an Offer Pool whenever they meet the criteria, including clicks that occurred before the Offer Pool was activated.
- A click can only be rerouted through an Offer Pool once. If you need to reroute it again, you can use the Conversion Manager.
- A click will only be rerouted if:
- It does not meet all the criteria of the original offer it was associated with and
- It does meet all the requirements of the new offer to which it’s being rerouted.
- Rerouted clicks will be updated in your reports and reflect the commission structure of the latest Offer. For the Payments page, data will only update if the given month is not marked as "locked" or "closed". Once a month is closed or locked in the Payments page the existing data will not update.
- In the Conversion Manager, you can see the Originating and Current Offer that a click has moved from and to.
Getting Started with Offer Pools
- Go to Campaigns > Offers > Offer Pools and click "+ OFFER POOL"
- Enter a name for your Offer Pool.
- (Optional) Select a brand if you want to limit your Offer Pool to a specific brand.
- Click “+ OFFER” to add your first offer.
- Select the offer you want to add and define the requirements (e.g., state must be California).
- Add a second offer and set its specific requirements.
- Continue adding as many offers as needed by following the same steps.
- Once you’re done, click "CREATE" to activate the Offer Pool.
Example: Offer Pool set up to reroute based on a player's location
Well done! You’ve created your first Offer Pool